Don't miss our holiday offer - 20% OFF!
Installing and Using Pull-Up Bars in Your Home Gym
Kickstart your home workout routine with a pull-up bar, but first, learn how to install and master it for a stronger, leaner you.
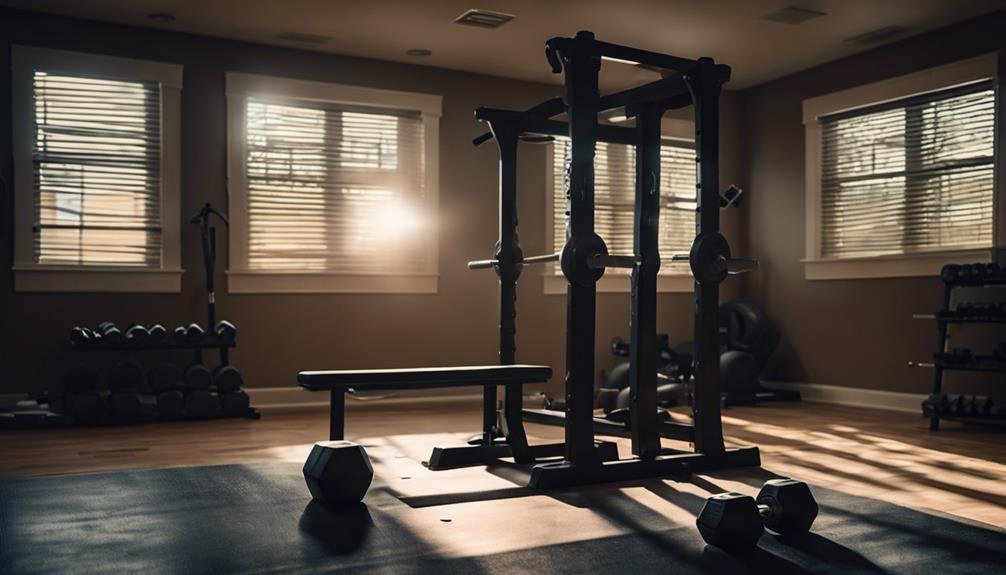
We've opted for a home gym setup that includes a pull-up bar, a vital piece of equipment for building upper body strength and achieving our fitness goals. To get started, we need to choose the right pull-up bar for our space and fitness goals, considering factors like durability, adjustable height, and grip positions. Next, we'll measure our doorway or wall, clear the area, and install the bar securely. Safety precautions like soft flooring, warm-ups, and spotting are a must. We'll explore different grip positions, workout techniques, and variations to stay motivated and avoid plateaus. Now, let's delve into the world of pull-ups and take our fitness journey to the next level!
Key Takeaways
- Consider factors like fitness goals and available space when selecting a pull-up bar that meets your needs and fits your budget.
- Measure the width of the doorway or wall to choose a bar that fits perfectly, ensuring enough clearance from the ceiling or overhead obstructions.
- Plan the perfect spot for the bar, taking into account any obstacles like molding or trim, and protect floors from damage during installation.
- Ensure the bar is securely anchored to prevent accidents, and perform regular cleaning and maintenance to guarantee a safe and functional pull-up bar.
- Experiment with different grip positions and workout techniques, incorporating variations into your routine to stay motivated and engaged in your fitness journey.
Choosing the Right Pull-Up Bar
When selecting a pull-up bar, we consider several factors to guarantee we get the right one for our fitness goals and available space. We want a bar that's sturdy, reliable, and tailored to our specific needs. One essential aspect is the bar material. We opt for bars made from high-quality steel or durable aluminum, ensuring they can support our weight and withstand frequent use. Some bars feature a powder-coated or chrome finish, which enhances their durability and resistance to corrosion.
Another key consideration is our budget. We set a price range and explore options within it. Fortunately, there are budget-friendly pull-up bars on the market that offer great value without breaking the bank. We can find affordable bars with basic features or invest in premium models with advanced features like adjustable height or multiple grip positions. By weighing our options carefully, we can find a pull-up bar that meets our fitness goals and fits our budget. With the right bar, we're motivated to start our workout routine and achieve our fitness objectives.
Measuring Your Doorway or Wall
As we get ready to install our pull-up bar, we need to take precise measurements to guarantee a secure and comfortable fit. We'll need to check the width of our doorway, considering factors like the bar's thickness and our own grip width. By taking these measurements, we'll be able to choose the perfect spot for our pull-up bar, whether it's on a wall or in a doorway.
Doorway Width Matters
We need to measure our doorway or wall to guarantee a perfect fit for our pull-up bar, so we're taking precise measurements to get started. This confirms that our bar fits snugly and securely, without any wobbling or instability. After all, we want to focus on our workout, not worry about the bar falling off!
To take accurate measurements, we're considering the following factors:
- Frame sizes: We're measuring the width of our doorway or wall to choose a pull-up bar that fits perfectly. This is vital, as different frames have varying widths to accommodate different room layouts.
- Room layouts: We're taking note of any obstacles, such as molding or trim, that might affect the installation of our pull-up bar. This helps us plan the perfect spot for our bar.
- Clearance: We're verifying that our pull-up bar has enough clearance from the ceiling or any other overhead obstructions, so we can perform exercises without bumping our heads or straining our necks.
Wall Type Considerations
With our doorway or wall measurements in hand, we're now evaluating the type of wall we're working with to guarantee our pull-up bar installs securely and safely. This step is vital, as different wall types require varying installation approaches. For instance, if we're dealing with a brick wall, we'll need to contemplate brick reinforcement to secure a sturdy hold. This might involve using specialized anchors or consulting with a professional. On the other hand, if we're working with plaster walls, we'll need to take extra precautions during the Plaster prep phase to avoid damaging the surface. This might involve using a stud finder to locate the wall studs or applying joint compound to create a smooth surface. By understanding our wall type, we can choose the right installation method and materials, guaranteeing a safe and secure pull-up bar that will withstand our toughest workouts.
Mounting Height Options
Now that we've got our walls classified, let's measure up and determine the ideal mounting height for our pull-up bar. This is vital to guarantee we've got enough ceiling clearance and floor space to perform pull-ups comfortably.
To get started, we'll need to measure the distance from the floor to the ceiling. Most pull-up bars are designed to be mounted between 7.5 and 9 feet off the ground, but we can adjust this based on our individual needs. We should also take into account the height of the tallest user, verifying they've got enough clearance to hang without bumping their head.
Some key factors to bear in mind when choosing our mounting height:
- Ceiling clearance: Guarantee we've got at least 12 inches of clearance between the bar and the ceiling to avoid bumping our heads.
- User height: Mount the bar at a height that allows the tallest user to hang comfortably with their arms fully extended.
- Floor space: Take into account the amount of floor space we've got available, bearing in mind the length of our pull-up bar and any surrounding obstacles.
Preparing the Installation Site
Before we start drilling holes and hammering screws, let's take a moment to clear the area around the installation site of any fragile or valuable objects that could get damaged during the process. Clearing clutter is essential to guarantee a smooth and safe installation. We don't want any obstacles getting in the way or, worse, getting broken. Move any furniture, decorations, or exercise equipment away from the area to create a clear workspace.
Next, let's think about protecting our floors. We'll be working with heavy tools and materials, so it's vital to cover our floors to prevent scratches or damage. We can use drop cloths, old sheets, or even cardboard boxes to create a barrier between our floors and any potential hazards. This simple step will save us a lot of stress and potential repair costs down the line. By taking these precautions, we'll be able to focus on the installation process without worrying about damaging our belongings or our floors. With a clear and protected workspace, we're ready to move on to the next step – installing our pull-up bar.
Installing the Pull-Up Bar
Now that we've prepared the installation site, we're ready to move on to the exciting part – installing the pull-up bar! We'll need to decide on the perfect spot for our bar, considering factors like ceiling height and surrounding clearance. Next, we'll explore secure mounting methods to guarantee our bar is sturdy and reliable for our workouts.
Bar Placement Options
We have several options to weigh when deciding where to install our pull-up bar, as the chosen location will ultimately affect our workout experience and overall convenience. Our home decor and available space will play a significant role in determining the ideal spot for our new equipment.
When thinking about bar placement, we should think about the flow of our workout routine and how we'll be moving around our home gym. Here are some options to ponder:
- Doorway: Installing the pull-up bar in a doorway can be a great space-saving solution, and it's often a convenient location that's easy to access.
- Wall-mounted: Mounting the bar to a sturdy wall can provide a stable and secure option, especially if we have a large, open space in our home gym.
- Freestanding: If we have the floor space, a freestanding pull-up bar can be a great option, allowing us to position it wherever we like and easily move it around as needed.
Secure Mounting Methods
We'll need to guarantee our pull-up bar is securely mounted to a sturdy surface to support our weight and maintain a safe workout environment. A sturdy anchor is vital to prevent the bar from falling or shifting during use. We can achieve this by using hidden brackets that distribute the weight evenly and provide a secure grip on the wall or ceiling.
Some secure mounting methods are:
| Mounting Method | Description | Benefits |
|---|---|---|
| Wall-Mounted | Attach the bar to a sturdy wall | Easy to install, space-saving |
| Ceiling-Mounted | Suspend the bar from the ceiling | Space-efficient, adjustable height |
| Doorway-Mounted | Attach the bar to a door frame | Portable, easy to install |
| Free-Standing | Use a freestanding pull-up bar | No installation required, easy to move |
When selecting a mounting method, think about the weight capacity, durability, and adjustability of the system. By selecting the right mounting method and using sturdy anchors, we can guarantee a safe and effective workout experience.
Safety Precautions to Consider
Before we start using a pull-up bar, we must identify potential hazards and take necessary precautions to avoid injuries. Installing a pull-up bar in our home gym can be an exciting addition, but we must prioritize safety above all.
As we begin our pull-up journey, let's take a moment to consider the following safety precautions:
- Soft Flooring: Make sure to install the pull-up bar over a soft flooring surface, such as a mat or carpet, to reduce the impact of potential falls.
- Injury Prevention: Warm up properly before using the pull-up bar, and start with lower reps and sets to avoid straining our muscles.
- Spotters: Consider having a spotter or workout buddy to assist us in case we lose grip or need help during a workout.
Different Grip Positions Explained
Mastering various grip positions is essential for targeting different muscle groups and preventing plateaus in our pull-up journey. We've all been there – stuck in a rut, doing the same old pull-ups with the same old grip. But it's time to mix it up! By changing our grip, we can engage different muscle groups, improve our grip strength, and avoid those frustrating plateaus.
Let's start with the basics. A pronated grip, where our palms face away from us, targets our latissimus dorsi and biceps. A supinated grip, where our palms face towards us, engages our biceps and upper back. But what about a neutral grip, where our palms face each other? This neutral rotation is a game-changer, as it targets our brachialis and anterior deltoids. By incorporating different grip positions into our routine, we can guarantee a more balanced workout and avoid overworking certain muscle groups. So, let's get creative with our grip positions and take our pull-up game to the next level!
Mastering the Perfect Pull-Up Form
As we work towards mastering the perfect pull-up form, we'll focus on three essential elements: establishing a solid grip and stance, aligning our bodies for ideal leverage, and engaging our core muscles to generate power. By nailing these fundamentals, we'll be able to perform pull-ups with confidence and precision. With practice and patience, we'll develop the strength and control needed to conquer this essential exercise.
Grip and Stance Fundamentals
We take our first step towards mastering the perfect pull-up form by focusing on the foundation of a successful lift: our grip and stance. A strong grip is essential for generating power and control throughout the entire range of motion. Developing grip strength through exercises like grip curls and dead hangs can greatly improve our overall pull-up performance.
When it comes to our stance, we want to establish ourselves for success. Here are some key considerations:
- Stance width: Make sure our hands are shoulder-width apart or slightly wider to maintain balance and stability.
- Grip type: Experiment with different grip types, such as pronated, supinated, or neutral, to find what works best for us.
- Finger placement: Place our fingers close to the bar, with our thumbs wrapped around it for added grip strength.
Proper Body Alignment
Now that we've nailed our grip and stance, we'll focus on maintaining a straight line from head to heels, engaging our core and squeezing our shoulder blades together to generate maximum power and control throughout the entire range of motion. This means keeping our shoulders down and away from our ears, chest up, and abs tight. Proper body alignment is key to mastering the perfect pull-up form. We'll make sure to correct our posture by keeping our ears, shoulders, hips, knees, and ankles in a straight line, avoiding any arching or sagging in our back. This will help us maintain a stable and efficient position, allowing us to generate more power and control as we lift ourselves up. By engaging our core and squeezing our shoulder blades together, we'll be able to generate maximum power and control, making it easier to complete each rep. With proper body alignment, we'll be able to perform pull-ups with ease and confidence, getting the most out of our workouts.
Engage Core Muscles
With our bodies aligned and stabilized, we'll engage our core muscles to generate even more power and control, creating an unstoppable force that propels us upward. This is where the magic happens! Our core strength plays a vital role in mastering the perfect pull-up form. When we engage our core, we create a solid foundation that allows us to generate maximum power and control.
Here are a few key takeaways to keep in mind:
- Core strength is key: A strong core helps maintain a straight line from head to heels, allowing us to generate maximum power and control.
- Muscle balance is essential: Engaging our core helps balance our muscles, ensuring that we're not relying too heavily on our arms or shoulders.
- Control is everything: By engaging our core, we can control our movement, slowing down or speeding up as needed to achieve a smooth, efficient pull-up.
Variations for Beginners and Experts
When we're new to pull-up bars, modified exercises can help us build strength and confidence, while experts can challenge themselves with advanced variations that target specific muscle groups. As beginners, we can start with assisted pull-ups using a resistance band or a partner to help us complete the movement. This allows us to build up our strength and endurance before progressing to unassisted pull-ups. As we get stronger, we can introduce Progressive Overload by increasing the difficulty of our workouts, such as adding weight or reps. For experts, Advanced Modifications like single-arm pull-ups, weighted pull-ups, or pull-up variations like the "L-sit" can help target specific muscle groups like the latissimus dorsi, biceps, and shoulders. By incorporating these variations into our workout routine, we can continue to challenge ourselves and see progressive results. Whether we're just starting out or are seasoned pros, incorporating variations into our pull-up routine can help us stay motivated and engaged in our fitness journey.
Incorporating Pull-Ups Into Your Workout
As we commit to a regular pull-up routine, we'll want to strategically incorporate this exercise into our overall workout schedule to maximize its impact on our fitness goals. This means carefully planning our workout routines to facilitate the most out of our pull-up practice.
Start small and set achievable goals, like completing a certain number of pull-ups each day or week. This will help us build confidence and momentum in our workout routine.
Mix it up by incorporating different types of pull-ups, such as close-grip, wide-grip, or weighted pull-ups, to target different muscle groups and avoid plateaus.
Take on a pull-up challenge, like doing a certain number of pull-ups each day for a week or completing a certain number of pull-ups in a row. This will help us stay motivated and engaged in our workout routine.
Maximizing Your Workout With Accessories
We can elevate our pull-up practice by incorporating a variety of accessories that target specific muscle groups and add intensity to our workouts. By mixing it up with different grips, resistances, and angles, we can avoid plateaus and prevent boredom. Adding accessories like resistance bands, gloves, or assistive devices can increase workout variety and challenge our bodies in new ways. For example, using a weighted belt can engage our core and legs, while a pull-up assist trainer can help us build up to unassisted reps. Plus, incorporating accessories can enhance our gym's aesthetics, making our home gym feel more like a professional space. By investing in a few key accessories, we can take our pull-up practice to the next level and achieve our fitness goals faster. With the right tools and mindset, we can push ourselves to new heights and achieve a stronger, leaner physique.
Space-Saving Installation Options
By opting for space-saving installation options, we can efficiently utilize every inch of our home gym, freeing up valuable floor space for other essential equipment. This is especially important for those of us with limited space, where every square foot counts.
When it comes to space-saving installation options, there are several choices available to us. Here are a few of our favorites:
- Foldable designs: These pull-up bars can be easily folded up against the wall when not in use, providing ample floor space for other exercises or activities.
- Compact frames: These bars have a narrower profile, allowing them to fit snugly into tight spaces, such as between two walls or in a corner.
- Wall-mounted options: These bars can be mounted directly to the wall, eliminating the need for a large, freestanding frame that takes up floor space.
Tips for Maintenance and Repair
Our pull-up bars require regular TLC to maintain they remain sturdy, reliable, and safe to use over time. We can't just install them and forget about them; we need to put in some effort to keep them in top condition. Regular cleaning is a must to prevent dirt and grime from building up and compromising the structural integrity of our bars. We can use a soft cloth and some mild soap to wipe down the bars, paying special attention to any areas with high friction, like the grip points. Rust prevention is also key, especially if our bars are made of metal. We can apply a rust-inhibiting coating or lubricant to protect the metal from corrosion. By taking these simple steps, we can guarantee our pull-up bars remain safe and functional for years to come. Let's make maintenance a habit to get the most out of our home gym investments!
Frequently Asked Questions
Can I Install a Pull-Up Bar in a Load-Bearing Wall?
'We consider load-bearing walls a go, but we need to guarantee proper installation using sturdy wall anchors, like molly bolts or toggle bolts, to distribute the weight safely and avoid any damage.'
How Often Should I Lubricate My Pull-Up Bar's Moving Parts?
We make it a habit to lubricate our pull-up bar's moving parts every 2-3 months to prevent rust and guarantee smooth movements, making bar maintenance a breeze and our workouts even more effective.
Are Pull-Up Bars Suitable for Users With Disabilities?
Did you know 1 in 5 people have a disability? We believe everyone deserves access to fitness. Fortunately, many pull-up bars are suitable for users with disabilities, offering accessible equipment and adaptive exercises to promote inclusivity and independence.
Can I Attach a Pull-Up Bar to a Concrete Ceiling?
"We can confidently attach a pull-up bar to a concrete ceiling by using concrete anchors that provide a secure hold, ensuring ceiling reinforcement for a sturdy and safe workout experience."
Will a Pull-Up Bar Damage My Doorframe Over Time?
"As we hang in the balance, wondering if our doorframe will hold, let's face it: a pull-up bar won't damage it if we choose a sturdy frame with a suitable weight capacity, ensuring our fitness journey doesn't come crashing down."
Conclusion
As we wrap up our journey to installing and mastering pull-up bars in our home gyms, we're left with a sense of empowerment, our palms gripping the bar with confidence, our bodies strengthened by the rhythmic motion of pull-ups. The sweat drips, the muscles ache, but with each rep, we rise stronger, our willpower forged like steel. Now, it's our turn to conquer the bar, to own our fitness journey, and to never let go.