Don't miss our holiday offer - 20% OFF!
Beginner Strength Training Exercises for Home Workouts
Optimize your fitness journey with these beginner-friendly strength training exercises tailored for home workouts, and get ready to transform your body.
We're taking the first step towards a stronger, healthier us by creating a home workout routine that fits our lifestyle and budget. With a few essential pieces of equipment like adjustable dumbbells and resistance bands, we can start building our strength. Let's start with upper body exercises like shoulder rolls and arm circles to build a strong foundation. We'll then move on to push-ups and tricep exercises to target our chest and triceps. And don't forget to incorporate core exercises like planks and leg raises to improve our posture. Let's get started and discover more effective exercises to transform our bodies!
Key Takeaways
- Start with essential equipment like dumbbells and resistance bands that are affordable, space-efficient, and versatile for a home gym.
- Focus on upper body exercises like push-ups, shoulder rolls, and arm circles that target multiple muscle groups and improve flexibility.
- Incorporate core stability exercises like planks, pelvic tilts, and Russian twists to improve posture and reduce the risk of injury.
- Practice proper form and technique to engage the correct muscles and avoid straining joints, and start with manageable reps and sets.
- Listen to your body, take breaks as needed, and gradually increase exercise intensity and frequency to achieve progressive overload and consistent progress.
Building a Home Gym on a Budget
Creating a home gym on a budget requires strategically scouring local classifieds, thrift stores, and online marketplaces for affordable equipment. We've learned that with a little creativity, we can build a functional home gym without breaking the bank. One key consideration is space optimization – we need to make the most of our available space. We've found that compact, multi-functional equipment like adjustable dumbbells and resistance bands are perfect for small spaces.
When it comes to budget-friendly alternatives, we've discovered that DIY solutions can be just as effective as their pricey counterparts. For example, we've used water-filled bottles as makeshift dumbbells and created our own pull-up bar using a wooden dowel and some rope. We've also repurposed household items like stairs and chairs to create makeshift workout stations. By thinking outside the box, we've managed to create a functional home gym that meets our fitness needs without draining our wallets. With a little resourcefulness, we can achieve our fitness goals without sacrificing our budget.
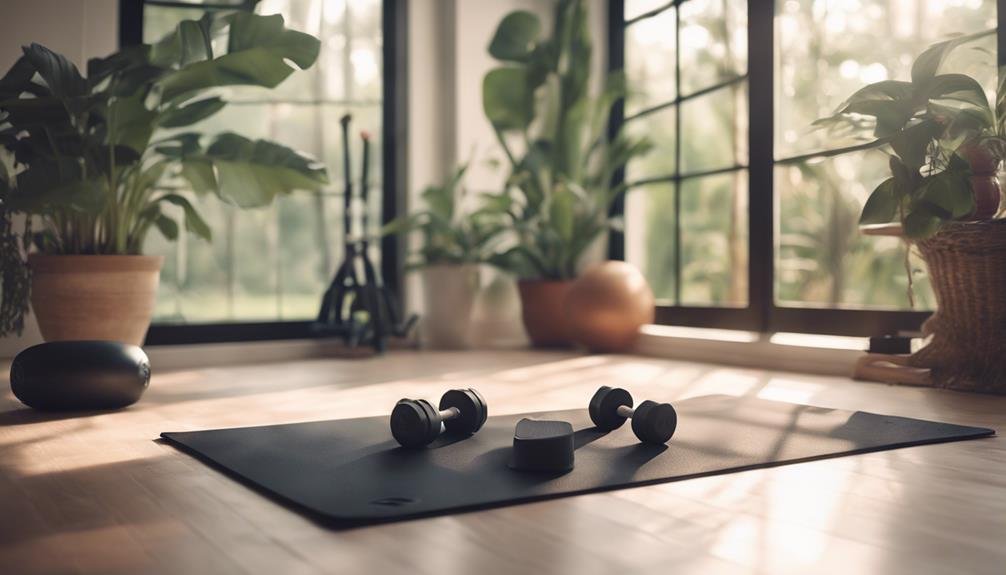
Essential Equipment for Home Workouts
As we set up our home gym, we've found that having the right equipment makes all the difference in getting a great workout. When it comes to essential equipment for home workouts, we believe that less is often more. You don't need to break the bank or clutter your workout space with unnecessary gadgets. Instead, focus on a few versatile pieces that can help you achieve a full-body workout.
First and foremost, a good set of dumbbells is a must-have for any home gym. They're affordable, space-efficient, and can be used for a variety of exercises targeting different muscle groups. A resistance band or tube is another great addition to your home gym, providing an affordable and portable way to add resistance to your workouts.
Upper Body Exercises for Beginners
Let's get started with upper body exercises, focusing on beginner-friendly moves that'll help us build strength and confidence. We'll begin with some simple yet effective exercises that don't require any equipment.
First, let's loosen up our shoulders with some Shoulder Rolls. Roll your shoulders forward and backward in a circular motion. Repeat this process 10-15 times. This exercise helps relax our shoulder muscles, improving posture and reducing tension.
Next, we'll move on to Arm Circles. Hold your arms straight out to the sides at shoulder height. Make small circles with your hands for 10-15 repetitions. This exercise targets our shoulder muscles, improving flexibility and range of motion.
These exercises may seem simple, but they're essential for building a strong foundation. By incorporating these exercises into our routine, we'll be able to tackle more challenging moves in no time. Remember to start slow, listen to our bodies, and take breaks as needed. With consistent practice, we'll be on our way to stronger, more confident upper bodies in no time!
Push-Ups for Chest and Triceps
We're now ready to tackle one of the most effective upper body exercises: push-ups, which target our chest and triceps. This classic exercise is a staple in any strength training routine, and for good reason. When done correctly, push-ups can contribute substantially to chest development, engaging our pectoralis major muscles. At the same time, they also work our triceps, helping to improve overall arm strength.
To get the most out of push-ups, proper form is crucial. Start in a plank position with your hands shoulder-width apart, engage your core, and lower your body until your chest almost touches the ground. Push back up to the starting position, squeezing your chest muscles at the top. For added variety, try incorporating different tricep variations, such as diamond push-ups or decline push-ups. These modifications can help keep your workouts fresh and challenging. By incorporating push-ups into our routine, we can expect to see notable improvements in our upper body strength and overall fitness.
Bodyweight Exercises for Bigger Shoulders
Building stronger shoulders demands a combination of targeted exercises and consistency, so we'll focus on effective bodyweight exercises to help us achieve broader, more defined shoulders. As we work on building shoulder strength, we'll be doing exercises that target the deltoids, which are the muscles that make up our shoulders.
Two essential bodyweight exercises for bigger shoulders are Shoulder Rotations and Lateral Raises. Let's start with Shoulder Rotations. We'll stand or sit with our arms at our sides, then lift our arms out to the sides until they're at shoulder height. From here, we'll rotate our shoulders in a circular motion, first clockwise and then counterclockwise. We'll do three sets of 10-12 reps for each direction. Next, we'll move on to Lateral Raises. We'll stand or sit with our arms at our sides, then lift our arms out to the sides until they're at shoulder height. We'll hold for a second, then lower them back down. We'll do three sets of 10-12 reps. By incorporating these exercises into our workout routine, we'll be on our way to stronger, more defined shoulders.
Bicep Curls With Dumbbells
We grab a dumbbell in each hand, palms facing forward, and prepare to target our biceps with a classic and effective exercise: the bicep curl. This exercise is a staple in any strength training routine, and for good reason – it's easy to learn, requires minimal equipment, and yields impressive results. With a dumbbell variety at our disposal, we can choose the weight that's just right for us, whether we're beginners or seasoned lifters.
As we begin, we focus on proper form: keeping our elbows close to our body, curling the dumbbells up towards our shoulders, and then slowly lowering them back down to the starting position. We aim for 3 sets of 12 reps, taking breaks in between to catch our breath and mentally prepare for the next round. To keep us motivated, we create a workout playlist that pumps us up and pushes us to push ourselves harder. With every curl, we feel our biceps growing stronger, and are convinced we're one step closer to achieving our fitness goals.
Tricep Dips Using a Chair
As we move on to tricep dips using a chair, we'll focus on the essential points that guarantee a safe and effective workout. We'll start by discussing proper chair positioning, which is vital for targeting the right muscles. Then, we'll cover safe dipping techniques and how to engage our triceps correctly to get the most out of this exercise.
Proper Chair Positioning
Our tricep dip form starts with proper chair positioning, which involves placing the edge of the chair firmly against a sturdy object to prevent it from slipping or tipping over during the exercise. We want to guarantee our chair is stable and secure, allowing us to focus on the exercise rather than worrying about our safety. To achieve this, we place the chair against a wall or a heavy piece of furniture, making sure it's firmly in place.
Next, we focus on our seating posture. We sit on the edge of the chair with our back straight, engaging our core and maintaining good back support. This helps us maintain a neutral spine and prevents straining our lower back during the exercise. We avoid slouching or leaning forward, as this can put unnecessary pressure on our joints and muscles. By maintaining good seating posture and proper chair positioning, we set ourselves up for a safe and effective tricep dip exercise.
Safe Dipping Techniques
With our chair securely in place and proper seating posture maintained, we'll now focus on executing the dipping motion itself, keeping our upper arms still and only bending our elbows to lower our body until our arms are bent at a 90-degree angle. This vital movement is essential for targeting our triceps effectively while preventing injuries.
To provide a safe and effective dip, we should:
- Start with a modified version of the dip, such as bending our knees or using a lower chair, to reduce the strain on our joints
- Avoid letting our elbows flare out to the sides, as this can put unnecessary stress on our shoulders and joints
- Keep our core engaged to maintain stability and balance throughout the exercise
- Experiment with different dip variations, such as changing the angle of our body or using different grip widths, to challenge our triceps and prevent plateaus
Effective Muscle Engagement
We'll maximize the effectiveness of our tricep dips by focusing on proper muscle engagement, ensuring we're targeting the correct muscles to achieve ideal results. To do this, we'll prioritize muscle isolation, concentrating on the triceps brachii, the primary muscle group being worked. As we lower our body, we'll mindfully engage our triceps, feeling the muscles contract and lengthen. This mindful movement helps maintain control throughout the exercise, reducing the risk of injury and ensuring we're targeting the intended muscles.
Lower Body Exercises for Strength
To build strong, stable legs, we need to target the major muscle groups in our lower body through exercises that work multiple joints simultaneously. This approach helps improve overall lower body strength, stability, and mobility. By incorporating exercises that engage our glutes, hamstrings, quads, and calves, we can develop a strong foundation for everyday activities and athletic pursuits.
Here are some essential lower body exercises to include in our workout routine:
- Calf raises: targets calf muscles, improving ankle mobility and stability
- Glute bridges: activates glutes, strengthening our posterior chain and improving hip mobility
- Lunges: works multiple joints, engaging quads, hamstrings, and glutes
- Step-ups: targets legs, glutes, and hips, improving overall lower body strength and coordination
Squats for Stronger Legs and Glutes
As we focus on squats for stronger legs and glutes, we'll explore the essential components that make this exercise effective. We'll start by emphasizing the importance of proper form – it's vital to get it right to avoid injuries and maximize results. By mastering the technique and building glute strength, we'll be on our way to a stronger, more toned lower body.
Proper Form Matters
Performing squats with proper form is essential, since even slight deviations from ideal technique can put unnecessary stress on our joints and muscles, leading to injuries and ineffective workouts. As we begin our squat journey, it's crucial to focus on Form Fundamentals to ensure a safe and effective exercise experience.
To avoid Injury Prevention, we must pay attention to the following key elements:
- Keep our back straight: Engage our core and maintain a straight line from head to heels.
- Lower slowly and controlled: Avoid jerky movements and take 2-3 seconds to descend into the squat.
- Weight in heels: Keep our weight evenly distributed on our heels, not our toes, to maintain balance and stability.
- Knees behind toes: Ensure our knees don't extend past our toes, reducing pressure on our joints.
Building Glute Strength
By incorporating squats into our workout routine, we can tap into stronger, more toned legs and glutes, and reap the benefits of enhanced overall athletic performance. This exercise is a powerhouse for building glute strength, which is essential for everyday activities and athletic pursuits. Weak glutes can lead to Glute Imbalances, causing poor posture, lower back pain, and decreased athletic performance.
To maximize the effectiveness of squats, we need to focus on proper form and Glute Activation. This means engaging our core, keeping our back straight, and squeezing our glutes as we lift. Here are some key points to keep in mind:
| Squat Tips | Benefits |
|---|---|
| Keep your back straight | Reduces strain on lower back |
| Engage your core | Improves stability and balance |
| Squeeze your glutes | Targets glute muscles effectively |
| Use proper footing | Prevents knee strain and improves balance |
| Start with lower reps | Builds strength and endurance gradually |
Calf Raises for Ankle Strength
We target our calf muscles with calf raises, a simple yet effective exercise that strengthens our ankles and improves overall lower leg stability. By incorporating calf raises into our home workout routine, we can improve our ankle mobility and foot mechanics, reducing the risk of injuries and enhancing our overall athletic performance.
Here are some key benefits of incorporating calf raises into our exercise routine:
- Improved Ankle Mobility: Calf raises help increase our ankle's range of motion, allowing for more efficient and effective movements.
- Enhanced Foot Mechanics: By strengthening our calf muscles, we can improve our foot's ability to absorb shock and adapt to different terrain.
- Injury Prevention: Stronger calf muscles can help prevent common ankle and foot injuries, such as sprains and strains.
- Better Athletic Performance: Calf raises can improve our overall athletic performance by increasing our power, speed, and agility.
Core Exercises for Better Posture
As we focus on building strength at home, we're now going to target our core muscles, which play a vital role in maintaining good posture. We'll explore how stronger abs can provide the necessary support for a healthier back, and discuss exercises that'll help us achieve better posture. By incorporating core stability exercises into our routine, we'll be taking a significant step towards improving our overall posture and reducing back pain.
Stronger Abs for Support
Our core muscles, including our abs, obliques, and lower back, play a crucial role in maintaining good posture and preventing back pain. We need strong core muscles to support our spine and maintain proper alignment. When we have weak core muscles, we're more prone to slouching and putting unnecessary strain on our back, which can lead to discomfort, fatigue, and even injury.
To build stronger abs and improve our posture, we need to focus on exercises that target our core power and abdominal endurance. Here are some essential exercises to get us started:
- Plank: Hold a steady position for 30-60 seconds to engage our core muscles and improve our posture.
- Russian twists: Strengthen our obliques with 3 sets of 10-15 reps on each side.
- Leg raises: Engage our lower abs with 3 sets of 10-15 reps.
- Bicycle crunches: Target our entire core with 3 sets of 10-15 reps.
Improve Your Posture Now
Improving our posture starts with targeting the muscles that support our spine, and by incorporating exercises that strengthen our core, we can stand taller and feel more confident in our own skin. When we focus on building a strong core, we're not just toning our abs, we're also improving our overall posture. This is because our core muscles, including our transverse abdominis, obliques, and lower back muscles, play a vital role in maintaining proper spine alignment. By strengthening these muscles, we can improve our back flexibility and reduce the strain on our spine. This, in turn, helps us stand up straighter and feel more confident in our own bodies. To get started, we can incorporate exercises like planks, bird dogs, and pelvic tilts into our daily routine. By committing to a consistent practice, we can start to notice improvements in our posture and overall physical well-being.
Core Stability Exercises
What's the most effective way to build a strong core that supports better posture, and which exercises will help us achieve this goal? As we aim to improve our posture, we need to focus on building a strong core that provides a solid foundation for our entire body. Core endurance is key to maintaining good posture, and it starts with exercises that target our core muscles.
Core stability exercises are essential to get us started:
- Plank: Hold a plank position for 30-60 seconds, rest for 30 seconds, and repeat for 3-5 sets. This exercise targets our core, shoulders, and back muscles.
- Pelvic Tilt: Lie on our back with our knees bent and feet flat on the floor. Tilt our pelvis upwards and then back down again, repeating for 10-15 reps.
- Russian twists: Sit on the floor with our knees bent and feet flat. Lean back slightly and twist our torso from side to side, touching our hands to the ground each time.
- Leg raises: Lie on our back with our arms extended overhead and raise our legs straight up towards the ceiling. Lower our legs back down without touching the floor, and repeat for 10-15 reps.
Plank for Stronger Core and Back
We start building a stronger core and back by holding a plank position for 30-60 seconds, engaging our entire core and promoting stability throughout our torso. This exercise is essential for improving our core endurance, allowing us to maintain good posture and reduce the risk of injury. As we hold the plank, we're engaging our transverse abdominis muscle, which wraps around our spine and pelvis, providing additional support and stability.
Leg Raises for Stronger Abs
As we move on to leg raises, we'll focus on perfecting our form to reap the benefits of stronger abs. We'll make sure to engage our core muscles to support our movements, and avoid arching our backs to prevent injury. By following these essential points, we'll be well on our way to achieving a stronger, more toned core.
Proper Form Matters
When performing leg raises, we maintain perfect form by engaging our core muscles, lifting our legs in a slow and controlled motion, and avoiding any jerky movements that could put unnecessary strain on our lower back. This is vital because proper form is the foundation of effective and safe strength training. In fact, Fitness Fundamentals dictate that we prioritize form over speed or quantity of reps. By doing so, we confirm that our Workout Wisdom is on point, and we're targeting the right muscle groups without risking injury.
Start with a manageable number of reps and sets, and gradually increase as we build strength and endurance.
Focus on slow, controlled movements to engage our core and avoid straining our lower back.
Avoid arching our back or using momentum to lift our legs, as this can put unnecessary strain on our joints.
Take breaks as needed, and don't push ourselves too hard – rest and recovery are just as important as the workout itself.
Engage Core Muscles
Let's target our core muscles with leg raises, a strength training exercise that can help us build stronger abs. As we engage in this exercise, we'll focus on proper form to get the most out of our workout. To start, we'll lie on our backs with our arms extended overhead and legs straight. Then, we'll lift our legs about 6-8 inches off the ground, holding for a brief moment before slowly lowering them back down. Maintaining core breathing is crucial, taking slow, deep breaths in through our noses and out through our mouths. As we lift our legs, we'll incorporate pelvic tilts, tilting our pelvis upwards and then back down again. This helps engage our core muscles and prevents straining our backs. By incorporating leg raises into our strength training routine, we'll be on our way to building stronger, more defined abs. With consistent practice and proper form, we'll be rocking a stronger core in no time!
Avoid Arching Back
We must avoid arching our backs during leg raises, as this common mistake can put unnecessary strain on our spines and diminish the effectiveness of the exercise. When we arch our backs, we're not only risking injury, but we're also failing to engage our core muscles properly. This can lead to poor posture and inefficient exercise form.
To maintain proper posture and promote back safety, we should:
- Keep our shoulders relaxed and down, avoiding scrunching them up towards our ears
- Engage our core muscles by drawing our belly buttons towards our spines
- Press our lower backs into the floor or mat, avoiding any curvature
- Focus on slow, controlled movements, avoiding jerky or bouncy motions
Cool Down Stretches for Recovery
After a strength training workout, our muscles are thirsty for relaxation, and incorporating cool down stretches into our routine can substantially reduce muscle soreness and improve flexibility. This is especially important for beginners, as we're more prone to injury and soreness. By incorporating cool down stretches, we can speed up our recovery time and get back to our workouts faster.
One of our favorite ways to recover is through yoga recovery exercises. These gentle stretches help increase blood flow and reduce muscle tension, leaving us feeling relaxed and rejuvenated. We also swear by foam rolling to release tension in our muscles. By rolling out our IT band, quadriceps, and hamstrings, we can reduce soreness and improve circulation. When we take the time to cool down and recover properly, we can perform better in our next workout and reduce our risk of injury. So, take a few minutes after your next workout to stretch it out – your muscles will thank you!
Frequently Asked Questions
Can I Start Strength Training if I Have a Pre-Existing Injury?
"We can start strength training with a pre-existing injury, but we must prioritize Injury Modifications and Safe Progression to avoid exacerbating the issue, ensuring a gradual and informed return to exercise."
How Often Should I Rest Between Strength Training Workouts?
Like a conductor leading an orchestra, we orchestrate our fitness journey, harmonizing rest and exercise. For ideal progress, we prioritize rest periodization, allowing our muscles to recover, and maintain workout consistency to avoid plateaus.
Can I Use Resistance Bands Instead of Dumbbells?
"We can definitely use resistance bands instead of dumbbells, and we love that they offer versatile band variations for portable workouts that fit our lifestyle, providing a great alternative for strength training on-the-go."
Will Strength Training Help Me Lose Weight and Body Fat?
As we begin our fitness journey, we're burning to know: will strength training torch our excess fat? Absolutely! By building muscle through resistance exercises, we'll ignite fat burning and spark significant muscle gains, ultimately shedding unwanted pounds.
Can I Do Strength Training Exercises During Pregnancy?
It is recognized that exercising during pregnancy can be safe, but it is essential to prioritize Pregnancy Safety and Fetal Development. We'll modify our routine to avoid high-impact moves and focus on low-to-moderate intensity exercises, always consulting our healthcare provider first.
Conclusion
We've laid the foundation for a killer home workout routine, and now it's time to get moving! With these beginner-friendly exercises, you'll be flexing your muscles like a pro in no time. Remember, building strength is like building a fire – it starts with a spark, and with consistent effort, it'll blaze into a inferno of progress. So, get pumping, and watch your body transform!